TIL #033
191217 화
오늘 배운 점
<Flutter>
1. 그동안 다른 업무들을 하다가 드디어 Flutter에 관한 글을 아주 오랜만에 쓰는 기분이다.
- Firebase messaging 패키지를 활용한 Notification 기능 구현에 대해 공부해보자.
- 역시 설정 작업을 해주어야 한다.
//installation @pubspec.yaml

dependencies:
  flutter:

    sdk: flutter

  firebase_messaging:

// android app src build.gradle

// update package name from defaultConfig -> applicationId

// add google-service
apply plugin: 'com.google.gms.google-services'

// android app build.grade
classpath 'com.google.gms:google-services:4.2.0'

// android app src main AndroidManifest.xml
<intent-filter>
  <action android:name="앱 이름"/>
  <category android:name="android.intent.category.DEFAULT">
</intent-filter>

// google-service.json 붙여넣기- 그 다음 Notification 코드를 작성해준다.
import 'package:flutter/material.dart';
import 'package:firebase_messaging/firebase_messaging.dart';

class _MyAppState extends State<MyApp> {
  String _message = '';

  final FirebaseMessaging _firebaseMessaging = FirebaseMessaging(); //인스턴스 생성

  _register() { //토큰으로 등록
    _firebaseMessaging.getToken().then((token) => print(token));
  }

  @override
  void initState() {
    super.initState();
    getMessage();
  }

  void getMessage(){
    _firebaseMessaging.configure(//받은 메시지에 관한 이벤트 처리
        onMessage: (Map<String, dynamic> message) async {
      print('on message $message');
      setState(() => _message = message["notification"]["title"]);
    }, onResume: (Map<String, dynamic> message) async {
      print('on resume $message');
      setState(() => _message = message["notification"]["title"]);
    }, onLaunch: (Map<String, dynamic> message) async {
      print('on launch $message');
      setState(() => _message = message["notification"]["title"]);
    });
  }

  @override
  Widget build(BuildContext context) {
    // TODO: implement build
    return MaterialApp(
      home: Scaffold(
        body: Center(
          child: Column(
            mainAxisAlignment: MainAxisAlignment.center,
            children: <Widget>[
              Text("Message: $_message"),
            OutlineButton(
              child: Text("Register My Device"),
              onPressed: () {
                _register();
              },
            ),
            // Text("Message: $message")
          ]),
        ),
      ),
    );
  }
}- 테스트용으로 push notification을 보내보고 싶을 떄, Firebase 콘솔을 이용한다. 서버 키는 Firebase에서 Project Overview > Project Settings > Cloud Messaging에서 복사해서 넣으면 된다. 디바이스 토큰은 터미널에서 복사하면 된다. 아래의 코드를 터미널에 입력하면 디바이스에 알림이 전송된다.
//서버키와 FCM 토큰 부분을 업데이트해서 콘솔에 입력

DATA='{"notification":
{"body": "this is a body",
"title": "this is a title"},
"priority": "high",
"data": {"clickaction": "FLUTTERNOTIFICATIONCLICK", "id": "1", "status": "done"},
"to": "FCM token"}'
curl https://fcm.googleapis.com/fcm/send -H "Content-Type:application/json"
-X POST -d "$DATA" -H "Authorization: key=Server key"
'
- Firebase를 사용하지 않는 방법도 있다. flutter_local_notifications 라는 패키지를 설치하면 되는데, 요 방식이 더 나은 것 같기도 하다.
//install @pubspec.yaml

dependencies:
  flutter:
    sdk: flutter

  flutter_local_notifications:

// 진동과 스케줄 기능 사용을 위한 수정 @AndroidManifest.xml

<manifest xmlns:android="http://schemas.android.com/apk/res/android"
    package="com.example.flutterappnoti">

    <!-- The INTERNET permission is required for development. Specifically,
         flutter needs it to communicate with the running application
         to allow setting breakpoints, to provide hot reload, etc.
    -->
    <uses-permission android:name="android.permission.INTERNET"/>
    <uses-permission android:name="android.permission.VIBRATE" />
    <uses-permission android:name="android.permission.RECEIVE_BOOT_COMPLETED"/>

// 알림 아이콘을 위한 이미지 android app arc res drawable
// app_icon.png 삽입

// 알림음 설정 (설정 안하면 디폴트톤) res 하위항목으로 raw 폴더 생성
// tone.mp3 삽입
import 'dart:async';
import 'package:flutter/material.dart';
import 'package:flutter_local_notifications/flutter_local_notifications.dart';
FlutterLocalNotificationsPlugin flutterLocalNotificationsPlugin;
@override
initState() {
super.initState();
var initializationSettingsAndroid =
AndroidInitializationSettings('app_icon');
var initializationSettingsIOS = IOSInitializationSettings();
var initializationSettings = InitializationSettings(
initializationSettingsAndroid, initializationSettingsIOS);
flutterLocalNotificationsPlugin = FlutterLocalNotificationsPlugin();
flutterLocalNotificationsPlugin.initialize(initializationSettings,
selectNotification: onSelectNotification); // 알림 눌렀을 때 발생할 이벤트 관리
}
Future onSelectNotification(String payload) async {
showDialog(
context: context,
builder: (_) => AlertDialog(
title: const Text("Payload"),
content: Text("Paylod : $payload"),
),
);
}// 출력은 이런식으로
Column(
mainAxisAlignment: MainAxisAlignment.center,
mainAxisSize: MainAxisSize.max,
children: <Widget>[
RaisedButton(
onPressed: _showNotificationWithSound,
child: new Text('Show Notification With Sound'),
),
SizedBox(height: 30.0),
RaisedButton(
onPressed: _showNotificationWithoutSound,
child: new Text('Show Notification Without Sound'),
),
SizedBox(height: 30.0),
RaisedButton(
onPressed: _showNotificationWithDefaultSound,
child: new Text('Show Notification With Default Sound'),
),
],
),Future _showNotificationWithSound() async {
var androidPlatformChannelSpecifics = new AndroidNotificationDetails(
'your channel id', 'your channel name', 'your channel description',
sound: 'slow_spring_board',
importance: Importance.Max,
priority: Priority.High);
var iOSPlatformChannelSpecifics =
new IOSNotificationDetails(sound: "slow_spring_board.aiff");
var platformChannelSpecifics = new NotificationDetails(
androidPlatformChannelSpecifics, iOSPlatformChannelSpecifics);
await flutterLocalNotificationsPlugin.show(
0,
'New Post',
'How to Show Notification in Flutter',
platformChannelSpecifics,
payload: 'Custom_Sound',
);
}
Future _showNotificationWithDefaultSound() async {
var androidPlatformChannelSpecifics = new AndroidNotificationDetails(
'your channel id', 'your channel name', 'your channel description',
importance: Importance.Max, priority: Priority.High);
var iOSPlatformChannelSpecifics = new IOSNotificationDetails();
var platformChannelSpecifics = new NotificationDetails(
androidPlatformChannelSpecifics, iOSPlatformChannelSpecifics);
await flutterLocalNotificationsPlugin.show(
0,
'New Post',
'How to Show Notification in Flutter',
platformChannelSpecifics,
payload: 'Default_Sound',
);
}
Future _showNotificationWithoutSound() async {
var androidPlatformChannelSpecifics = new AndroidNotificationDetails(
'your channel id', 'your channel name', 'your channel description',
playSound: false, importance: Importance.Max, priority: Priority.High);
var iOSPlatformChannelSpecifics =
new IOSNotificationDetails(presentSound: false);
var platformChannelSpecifics = new NotificationDetails(
androidPlatformChannelSpecifics, iOSPlatformChannelSpecifics);
await flutterLocalNotificationsPlugin.show(
0,
'New Post',
'How to Show Notification in Flutter',
platformChannelSpecifics,
payload: 'No_Sound',
);
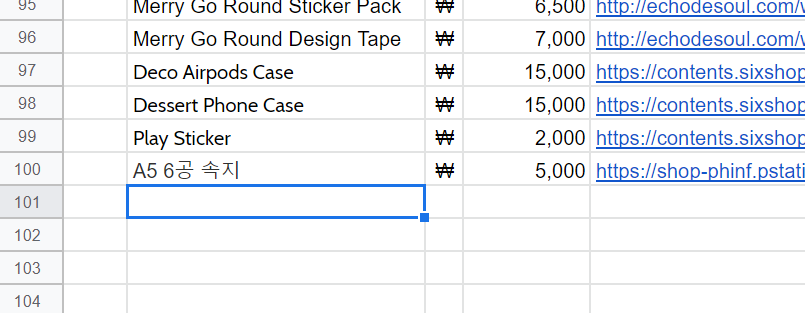
}2. 굿즈 DB 업로드
- 매주 하는 굿즈 아이템 15개씩 찾아서 올리기! 벌써 100개 돌파라니 신기하다.
내일 배울 점
<Flutter>
1. 마이스튜디오 화면 수정
더보기
- 내일이면 종강~
'삽질하는 개발자 hashblown' 카테고리의 다른 글
| 프론트엔드 개발자의 TIL #035 (0) | 2019.12.20 |
|---|---|
| 프론트엔드 개발자의 TIL #034 (0) | 2019.12.18 |
| 프론트엔드 개발자의 TIL #032 (2) | 2019.12.16 |
| 프론트엔드 개발자의 TIL #031 (0) | 2019.12.15 |
| 프론트엔드 개발자의 TIL #030 (0) | 2019.12.14 |


댓글